In this blog I will be discussing the the physical and physiological effects of breathing. There are two main reasons we breathe. The main reason is the physiological reason of getting oxygen into our cells. Perhaps surprisingly to many people the best way to achieve this is to safely breathe as little as possible (hypoventilation) to stimulate the Bohr effect which says significant carbon dioxide must be present for oxygen to be able to enter the cells (see this blog article). The other reason we breathe could be called physical reason and it includes the effects on joints, muscles, nerves, the mind, emotions, blood floor, digestion, reproduction and immunity. In this blog on breathing (Part 1) I will be focusing on the physical effects of breathing. If you breathe, or use the muscles of breathing in certain ways you can radically improve and/alter strength, flexibility, nerve function, blood flow and internal organ health. Many people inadvertently only focus on this reason for breathing and in their enthusiasm and often lack of knowledge they over-breathe (hyperventilate) and thus miss the primary purpose of breathing. In the next blog on breathing (Part 2) I will be focusing on how to achieve the physiological effects of breathing. The advanced practitioner can control their breath in such a way the both the physical and physiological benefits of breathing are achieved at the same time.
Most people should do only natural breathing (simple breath-control) in posture and during movement:
It is best for most people (until they are very experienced) to practice posture and movement separate to specific breath-control. It is difficult for most people do more than one thing at once while they each still being learnt. What tends to happen when people try to learn posture and breathing at the same time is that either the posture or the breathing is compromised. Compromising the posture lead to damaged muscles, ligaments or joints. compromising breathing could lead to over-tension, over-stress and the problems of over-breathing (hyperventilation). Natural breathing has three fundamental properties
1. inhalation is diaphragmatic (abdominal)
2. exhalation is passive
3. the amount of breathing is minimal
Only very experienced people should practice advanced breath-control exercises in complex posture and during movement:
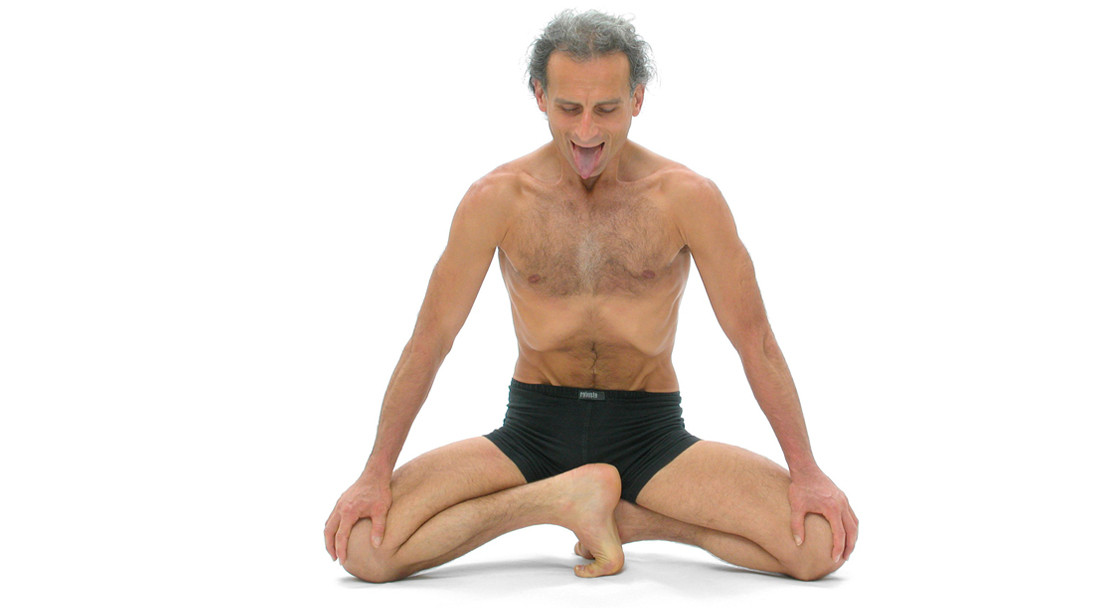
")
Figure 1: In this photo I am moving my body and in a relatively difficult posture side-lengthening, twisting, backward bending lunging posture while doing a fairly advanced breath-control exercise. It is recommended that unless you are very experienced it is best to do natural breathing while movement. (Photo courtesy Nick Aldridge)
In Figure 1 I am doing advanced spinal breathing during complex movement. I follow a path of inhalation that lasts up to 2 minutes on some breaths and a path of inhalation that last up to 2 minutes for exhalation on other breaths. As I ‘breathe into’ a part of the trunk I simultaneously expand that part, lengthen it, relax it and focus on it as I move it. When I ‘breathe out of’ part of the trunk I simultaneously expand that opposite part of the trunk, lengthen it, relax it and focus on it as I move it. This can create quite complex patterns for the mind to visualise but it also has very heating effect and does wonders to the strength, flexibility and wellbeing of the trunk, spine, internal organs and energy levels. In the simplest physical version of this exercise I twist my body to the left side while spiralling my breath around the trunk lengthening first the back f the body, then right side, then the front and then then left side, then I repeat a similar breathing starting from the opposite side in the opposite direction. Before you attempt this it is best to practice long slow breathing in a seated posture (see Part 2 of this blog to come soon), and separately practice the movements with natural breathing.
Spinal movements with coordinated spinal breathing:
It is suggested in the yoga texts that most people (until very experienced) are best suited to focus on posture and movement with natural breathing and focus on specific breathing patterns in only simple postures like sitting up straight our lying supine.
However, if you have mastered both your breathing as well as posture and movement then the two can be very effective to combine.
Most people who combine special breathing with posture and movement tend to over-breathe (hyperventilate) and/or over tense their trunk, and block energy and movement with their muscles of forced abdominal exhalation (the co-activaton of both sides of the internal and external abdominal oblique muscles that are ideally used mostly for actively twisting (axially rotating) the spine.
Breathing can control spinal movements:
In this section I am referring to simple spinal movement such as those shown in Figure 2. Although the spine can move into forward bending (spinal flexion) and backward bending (spinal extension) by itself, if you breathe in certain ways breathing can also cause the spine to move into forward bending (spinal flexion) and backward bending (spinal extension). Forward bending (spinal flexion) can be done in two main ways. You can either increase the lengthen of the back of the trunk (lengthen the back) or you can decrease the length of the front of the trunk (shorten the front). Similarly for backward bending (spinal extension) there are two main ways of practicing. You can either lengthen the front of the trunk or you can shorten the back. All four possibilities are possible and none are wrong to do but most normal adults (~90%) find that there is discomfort that leads to back pain if you bend backwards (spinal extension) by shortening the back of the body, so it is generally not recommended for most people. Similarly, some people (~1-2%) find that there is discomfort that leads to back pain if you bend forwards (spinal flexion) by lengthening the back of the body. Additionally many people can only lengthen the back by hardening the abdominal oblique muscles in a way inhibits spinal movements and also inhibits the diaphragm, so it is generally not recommended for most people to bend forward by lengthening the back unless it can be done with no discomfort and while still being able to feel the breath start in a relaxed abdomen. Here are 4 possibilities that can arise once you know this information:
- If you inhale into the front of your trunk your front will expand and this causes your back to bend backwards (spinal extension) slightly.
- If you exhale from the front of your trunk your front will contract and this causes your back to bend forwards (spinal flexion) slightly.
- But if you inhale into the back of your trunk your back will expand and this causes your back to bend forwards (spinal flexion) slightly.
- And if you exhale into your back of your trunk your back will contract and this causes your back to bend backwards (spinal extension) slightly.
To get the best effect from ‘spinal breathing’ you need to be able to isolate the transversus abdominis muscle fibres independently of the internal and external abdominal oblique muscles. You also need full control of your diaphragm (abdominal breathing muscle control) and also your chest (thoracic breathing control). This is only possible for about one or two in every twenty untrained people
In much of my dynamic and static practice I inhale in at least two parts and exhale in at least two parts using a combination of four main methods depending on my purpose at the time:
METHOD 1: Ascending inhale and ascending exhale
Inhale up the back (spinal flexion) then inhale up the front (spinal extension)
Exhale up the back of the body (spinal extension) then exhale up the front (spinal flexion)
Effects on internal organs and energy: massages internal organs upwards and pushes energy upwards on inhale and exhale
METHOD 2: Ascending inhale descending exhale
Inhale up the back (spinal flexion) then inhale up the front (spinal extension)
Exhale up the back of the body (spinal extension) then exhale down the front (spinal flexion)
Effects on internal organs and energy: massages internal organs upwards and pushes energy upwards on inhale and massages in internal organs downwards and pushes energy downwards on exhale
METHOD 3: Descending inhale and descending exhale
Inhale up the back (spinal flexion) then inhale down the front (spinal extension)
Exhale up the back of the body (spinal extension) then exhale down the front (spinal flexion)
Effects on internal organs and energy: massages internal organs downwards and pushes energy downwards on inhale and exhale
METHOD 4: Descending inhale and ascending exhale
Inhale up the back (spinal flexion) then inhale down the front (spinal extension)
Exhale up the back of the body (spinal extension) then exhale up the front (spinal flexion)
Effects on internal organs and energy: relieves prolapse, as well as massages internal organs downwards and pushes energy downwards on inhale and massages internal organs upwards and pushes energy upwards on exhale

Figure 2: In this series of photos I am demonstrating moving in synchrony with my breathing. In the more complex form of the exercise I am moving my body from a simple forward bending (back lengthening) posture while inhaling, to a simple backward bending (front lengthening) posture while continuing to inhale, then to a simple forward bending (back lengthening) posture and exhaling first from the chest then from the abdomen. It is recommended that unless you are very experienced it is best to do natural breathing with these movements and the breath works by itself in a similar fashion. (Please click on this photo to enlarge and see the detail).
In the attached photo montage (Figure 2) I am doing a dynamic exercise that moves between spinal flexion and spinal extension.
* The photo describes breathing related to Method 2 above.
* The first part of my inhalation begins in my pelvic floor and immediately fills the space between L5-S1, then the inhale moves up the back of my trunk and essentially lengthens my back without shortening my front. At this point my abdomen is completely relaxed and I begin with diaphragmatic breathing in which my navel moves backwards and upward.
* The second part of my inhalation goes up the front of my spine and this is synchronised with spinal extension in which I lengthen my front body without shortening my back body. This part of the inhalation is also initiated with an expansion of the pelvic floor and then expansion of the lower abdomen, upper abdomen, then the chest.
* The first part of my exhalation is passive and consists of deepening the spinal extension by lowering tail bone and then moving the L5 vertebra (and the navel) forwards and upwards to further lengthen the front.
* The next part of my exhalation goes down the front of the body and is initiated from the lower abdomen with a voluntary activation of the rectus abdominis which helps to move the L5 vertebra (and the navel) forwards and downwards into spinal flexion. This initiates an exhalation from my chest.
* Then I voluntarily release and relax the rectus abdominis and use first my upper then my lower transverse abdominis to move my navel downwards and backwards in preparation for the next inhalation from that position.
* This method can actually be used in any posture or movement. It is not only a very powerful way of training both breathing and spinal muscles but is also a really effective way to mobilse your spine, increase body heat and circulation, and massage the internal organs.
Once these method of inhaling and exhaling in two sections up and down the trunk with spinal flexion and extension is mastered then it is also possible to do the same with left and right sided spinal lateral flexion (i.e. in side bending postures)
***************

Figure 3: In this series of photos I am demonstrating moving my abdomen and chest using my breathing muscles with or without actually breathing. In the simplest form of the exercise i am expanding and contracting my chest, whole abdomen, upper abdomen and/or lower abdomen as I inhale and/or exhale. In the more complex form of the exercise I am using the same muscles but without actually breathing. (Please click on this photo to enlarge and see the detail
Rolling the abdomen up and down using the transverse abdominis muscles to ‘massage’ the internal organs while you breathe:
This looks strange I know, but it feels amazing and does wonders for the physical and physiological body! As the abdomen rolls upwards on inhale and exhale it ‘pulls’ the internal organs as well as blood flow (internal energy) downwards on inhalation and ‘pushes’ the internal organs as well as blood flow (internal energy) upwards on exhalation. The sequence for rolling in the abdomen from bottom to top on exhale, and then for rolling out the abdomen from bottom to top on inhale is as follows:
1. Relax then expand the pelvic floor
2. Inhale softly expanding the lower abdomen
3. Inhale softly expanding the upper abdomen
4. Contract the pelvic floor
5. Exhale by softly drawing in the lower abdomen
6. Exhale by softly drawing in the upper abdomen
As the abdomen rolls downwards on inhale and exhale it ‘pulls’ the internal organs as well as blood flow (internal energy) upwards on inhalation and ‘pushes’ the internal organs as well as blood flow (internal energy) downwards on exhalation.The sequence for rolling in the abdomen downwards on exhale, and then rolling out the abdomen downwards on inhale is as follows:
1. Contract the pelvic floor first
2. Inhale softly into the upper abdomen (or inhale into the chest if the upper abdomen is too difficult)
3. Relax the pelvic floor, then inhale softly and expand the lower abdomen
4. Expand the pelvic floor
5. Exhale by softly drawing in the upper abdomen
6. Exhale by softly drawing in the lower abdomen
Breathing for improving internal organ health:
If you want your breathing to help your digestive system, you have to know how to control the muscles of inhalation and exhalation in a way that allows you to massage and manipulate the internal organs. If you can learn to breathe into your chest with your abdomen soft, you can help relieve prolapse of the internal organs. One of the ways to expand the chest in a way that the abdomen is not hard is by making the underarm muscles (pectoralis major and latissimus dorsi) firm. Another way of having the chest expand without having the abdomen hard is to lift the shoulders up past the ears, and then breathe into the chest. This can help to pull the chest up in a way that won’t make the abdomen hard, and can cause the internal organs to be drawn upwards, which can relieve prolapse pressures in the intestines that can cause problems such as constipation and infertility. However, prolapse will not be relieved, and the digestive system will not be helped, if the only way you can breathe into the chest is by tightening the abdomen using the muscles of forced abdominal exhalation.
Another method you can use to relieve prolapse of the internal organs, as well as enhance the digestion and absorption of nutrients and elimination of waste, is by rolling the abdomen up and down using inhalation and exhalation (as described above and in Figures 2 and 3). To achieve this you need to exhale in a way that the abdomen does not go hard. This can be done by simply using the transverse abdominal (TA) muscle fibres, which are belt-like muscle fibres going around the waist, in sequence. It is possible to isolate and activate the lower abdominal TA fibres and use them to draw in the lower abdomen softly, then to isolate and activate the upper abdominal TA fibres to draw in the upper abdomen softly as you complete your exhale. When you inhale, you can use your diaphragm to expand the lower abdomen first, while simultaneously releasing the lower TA fibres, and then inhale to the upper abdomen while simultaneously releasing the upper TA fibres. So it looks like a rolling effect. This massages the internal organs upwards. This method can push the internal organs upwards and can also relieve prolapse. Exhaling with the lower abdominal TA fibres is enhanced in most people if you precede your inhalation with a contraction of the pelvic floor. Inhaling to the lower abdomen first necessitates the release of the lower TA fibres and this is enhanced if you precede your inhalation with an expansion of the pelvic floor.
It is also possible to roll the abdomen the other way, exhaling from the upper abdomen, then the lower abdomen, and inhaling from the upper abdomen first, and then inhaling into the lower abdomen. This method can push the internal organs downwards.
The key to achieving these exercises is to isolate the pelvic floor as indicated in the lists above, the lower TA fibres and the upper TA fibres separately in a sequence.
In the photos of Figure 3, which were all taken in one breath cycle as part of Tadagi mudra I am using the same muscle control as described above but without breathing. I begin with and inhalation retention and finish in an exhalation retention:
(1) chest contraction and abdominal contraction (using oblique abdominal muscles) with inhalation retention;
(2) chest expansion with abdominal contraction (using oblique abdominal muscles) with inhalation retention;
(3) chest compression and lower abdominal TA (transverse abdominis muscle) compression (with upper and lower abdomen still soft) with inhalation retention;
(4) chest compression with abdomen relaxed with inhalation retention;
(5) chest expansion with abdomen relaxed with exhalation retention
(6) chest expansion with rectus abdominis with exhalation retention
The addition of the breath retentions in this way using compressive and expansive bandhas (as described below) gives benefits similar to those described by authors on hyperbaric oxygen therapy and intermittent hypoxic therapy.
Using bandhas to change intra-abdmominal and intra-throacic pressures:
In terms or structure, a bandha is the co-activation of opposing (antagonistic) muscle groups around a joint complex. This can always be done in two main ways. In one way the joint becomes firm and compressed (ha-bandha) and in the other way the joint becomes firm and expanded (tha bandha). On a physical level most of the bandhas give stability around the joint complexes. However, a physiological level bandhas (which are a type of mudra or energy-control system) act as gates (locks) that can either enhance (tha-bandha) or discourage (ha-bandha) the movement of blood and circulation of prana (energy) and citta (information) through the nadis (subtle channels of the body). Some people have asked for clarification about the bandhas, this is a photo montage with a different spiel below to clarify the points people have had questions about after reading my post:

Figure 4: This montage shows the external form of Uddiyana bandha (left) and Tadagi Mudra (right) and the muscles used to create these mudras. (Please click on this photo to enlarge and see the detail)
STRANGE but Useful Opposite Anatomy of Uddiyana Bandha and Tadagi Mudra:
UDDIYANA BANDHA: (left figure) (on exhalation retention)
The diaphragm muscle is relaxed and lengthened partly due to the expansion of the rib cage via the intercostal muscles, which causes the fully relaxed abdomen to be ‘sucked’ up.
TADAGI MUDRA: (right figure) (on inhalation retention)
The diaphragm muscle is active (tense/contracted) and shortened partly due to the contraction of the rib cage via the intercostal muscles, which causes the fully relaxed upper abdomen to be pushed out. The lower transverse abdominis muscles are active/contracted (but soft) and upper transverse abdominis are totally relaxed.
These are both really useful mudras can be used effectively to move energy through the body in pranayama and asana.
Two common questions regarding bandhas can take the following form:
Question 1. Mula bandha: in many books it is described as the lift of the perineum, but in your anatomy course you define bandha as the co-activation of opposing muscle groups around a joint complex. So it looks like that from that point of view mula bandha is more like bringing the navel toward the spine like in lolasana. Is that correct?
Question 2. Uddyana bandha: people practicing ashtanga vinyasa yoga say, you should alway hold your bandhas, but from this explanation it seems very hard for me to hold uddyana bandha while you do backbend. Am I not understanding this bandha correctly?
Question 3. Are bandhas used differently in asana and pranayama?
My answers:
1. Different types of mula bandha:
There is much confusion about bandhas in the world of modern yoga. Part of the explanation to the question of mula bandha is that when you engage the lower abdominals (lower transverse abdominis but not the oblique muscles) then the perineum also comes on. Conversely, if you can activate the perineum but not the anus, then you also stimulate the lower abdominals in a way that does not inhibit the diaphragm. If the diaphragm is inhibited, which is what happens when you engage the anus and/or the abdominal obliques (as in when you forcefully exhale to bring the navel to the spine), then you will inhibit the diaphragm and instead of being ‘firm but calm’ (sthira sukham asanam) you will be tense and weak. I explain this much more in our blog on what it really means to ‘pull the navel towards the spine, as it is a big topic and here I am only touching upon it here. What you are seeing me do in the photo of tadagi mudra (Figure 4) is using only my lower transverse abdominis muscles (the real lower abdominals) and not hardening my abdomen at all. This is a type of compressive (ha) mula bandha that does not cause tension, stress or inhibition of the diaphragm, as opposed to the more commonly seen ha-mula bandha, which is the co-activation of the opposing oblique muscles that does cause hardness in the abdomen, draw the navel closer to the spine, inhibit the movements of the spine and cause the inhibition of the diaphragm. However, this hardening bandha is still a useful as part of pranayama and part of the nauli lauliki kriya.
2. Different types of uddiyana bandha:
With respect to uddiyana bandha and its differing forms that regularly confuse many people there is harmony is opposition seen in Figure 4. In Figure 4 the uddiyana bandha on exhalation retention is a tha-uddiyana bandha, which is an expansive co-activation of the intercostal muscles of the chest, that is most useful with pranayama but does not give much strength to the trunk of protection to the lower back. Conversely, the tadagi mudra is a compressive co-activation of the intercostal muscles of the chest (a ha-uddiyana bandha on inhalation retention), that is also used in pranayama but is most useful (in a slightly different form) in developing strength to lift up to handstands, and in postures like lolasana, and is very protective of the lumbar spine in backward bending postures. However, the pulling in of the lower front ribs (ha-uddiyana bandha) that you see in my tadagi mudra in the above photo, which is done by me using my intercostal muscles, is done by most people using only the rectus abdominis (which will also pull the lower ribs in) and not the intercostals at all. Hence many modern yoga practitioners think that uddiyana bandha is to do with the tensing of the rectus abdominis and/or other abdominal muscles. In Lolasana and most backward bending postures, I also use the rectus abdominis, but for me this is engaged as part of one type of tha-mula bandha that increases trunk stability, protects my lower back but allows blood flow to the limbs and still allows my diaphragm to function. However, the ability to draw the ribs inwards (ha-udddiyana bandha) and lower abdomen inwards (ha-mula bandha) without using either the oblique muscles or the rectus abdominis (while keeping the upper abdomen soft as in the tadagi mudra shown in the photo) is what differentiates the two extreme types of uddiyana and mula bandhas, and this is primarily what confuses many people doing ashtanga vinyasa yoga. Studies by physiotherapists on real time ultrasound show that only about one in ten people can actually engage their lower abdominals (lower transverse abdominis) without engaging the oblique muscles and inhibiting the diaphragm. Similarly only about one in ten people have any real control over their chest muscles (internal and external intercostals) without having to first inhibit their diaphragm.
3. Differing uses of bandha in asana and pranayama:
Re the use of bandha varying: it is not so much that bandhas are used differently in asana and pranayama, but there are always two extreme forms of each of the three main bandhas that can be used in either pranayama or asana – one extreme bandha is a high pressure (ha) bandha that ‘pushes’ blood and energy (prana), and the other extreme bandha is a low pressure (tha) bandha that ‘pulls’ blood’ and energy (prana). At some point I will publish the RMIT university research we did proving this to be the case on infra-red camera. These bandhas are the locked and unlocked doors (locks) that we can create in the body to move energy and information through the body as well as to create stability in the 9 main joint complexes. There are of course 6 more bandhas – this is all explained in detail in our online course and book “Applied Anatomy and Physiology of Yoga’ .
Share this Post
Comments 7
Awesome…I teach as much as I think my class sharers can take in (literally) regarding breath…it changed my life my yoga and world….
Namaste Susan xx
Hello Simon, i’m your student from Ireland and would like to ask a permission to translate the above article into Polish and publish it on my yoga website, I find it really interesting.
Namaste
Pingback: Breathing tips from Simon Borg-Olivier | Wayward Yogi
Author
Hi Anna – thank you very much – yes that will be fine – please translate this article to Polish to share with them as well. Can you however please try and keep it in the same form using the same photos and format and also say that it comes from myself Bianca Machliss and Yoga Synergy and please put a link to the original article – I am really glad you saw this – it is pretty much what i was teaching you and the others in Ireland (that was a great weekend workshop) cheers and best wishes – simon
Thanks Simon. I will try to keep the same format and once it’s ready I will send you the link. Adios
Great post This article is very informative and I think that a lot of people can learn a lot about breathing. I use breathing exercises to help me cope with my anxiety and stress but i didn’t know that I can also use it to help my spine internal organ and energy level. I like how detailed and specific the information is here, it makes it much better to understand and follow. I will definitely do these exercises and share them this information to my family and friends. Thank you so much for sharing this!
Pingback: How To Breathe To Help Your Spine, & Internal Organs | Petite Girls Guide